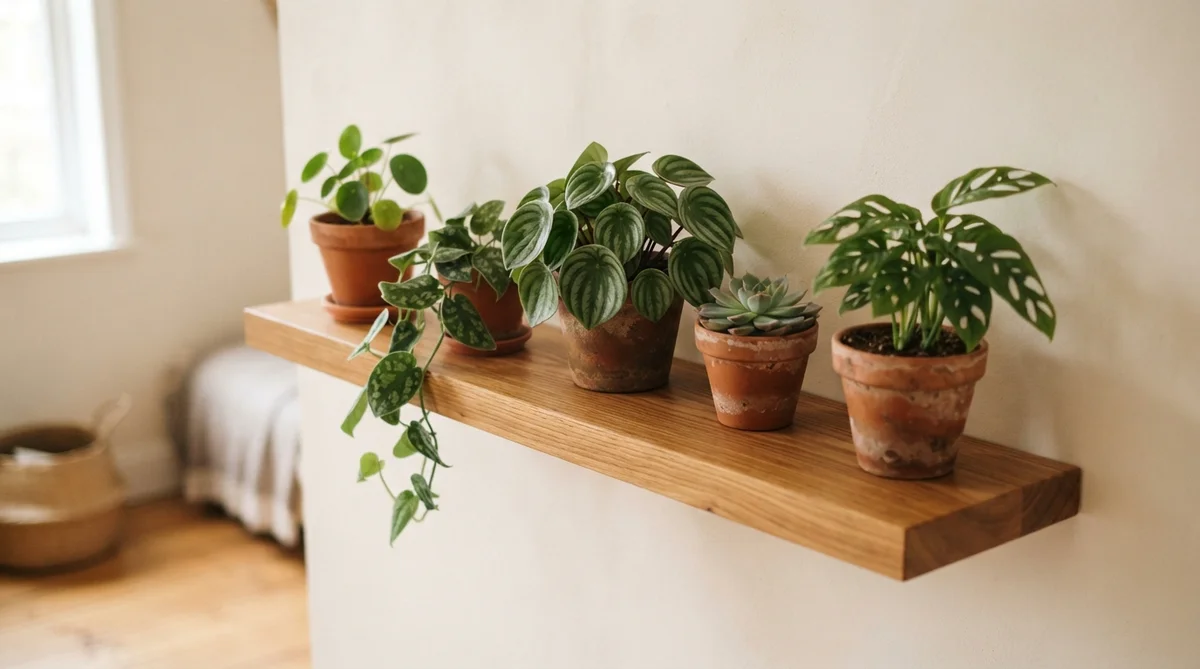
AT A GLANCE
The safest way to make a floating plant wall shelf is to keep the display light, anchor it for your wall type, and protect the shelf from watering spills.
- Allow roughly $25 to $80 for lumber, hardware, finish, and a few basic tools, based on typical U.S. retail prices checked in August 2026.
- Choose a shelf at least 8 inches deep if it will hold small pots, because narrow picture ledges can tip or crowd containers.
- Use a stud, a properly rated hollow-wall anchor, or masonry hardware rather than relying on a screw alone.
- Keep damp pots on saucers and wipe spills promptly to prevent swelling, stains, and mold growth.
The wall construction, total wet weight, and amount of direct sunlight determine which shelf design and anchors will work.
How to Build a Floating Plant Wall Shelf
To build a floating plant wall shelf, select a rigid board, add a concealed bracket or cleat, finish the wood against moisture, and secure it to suitable wall hardware. A simple shelf works well for trailing plants because it leaves floor space open and places foliage at eye level.
Choose the Shelf Design, Size, and Materials
Choose a solid wood board or a high-quality furniture-grade panel that will not sag under concentrated pot weight. A board between 24 and 36 inches wide, 8 and 10 inches deep, and about 3/4 inch thick suits most small displays.
Measure the combined weight of the shelf, brackets, pots, soil, and watered plants before buying hardware. Wet potting mix can weigh substantially more than dry mix, so leave at least 25% spare capacity above your estimated total.
For a straightforward DIY floating plant shelf, gather:
- A straight wood board, concealed shelf bracket, or metal floating-shelf kit
- Fine and medium-grit sandpaper, a sanding block, and a clean cloth
- Interior paint, wood stain, or clear water-resistant finish
- Wall screws and anchors rated above the completed shelf weight
- Small saucers, waterproof trays, or sealed plant pots
A narrow ledge is suitable for faux foliage or small air plants, while a deeper shelf is better for potted pothos, spider plants, and compact succulents. If you are adapting a picture shelf, check its stated load rating rather than assuming it can hold several wet containers.
Gather the Tools and Hardware
You will need a tape measure, pencil, level, drill, drill bits suited to the wall, screwdriver, stud finder, and a step stool. Add safety glasses when drilling, and use a dust mask when sanding painted or engineered wood.
Match the hardware to the wall rather than choosing anchors by appearance. Drywall, plaster, brick, concrete, and tile each require different drill bits and fastening methods.
Check for electrical cables and plumbing before drilling. If you cannot identify the wall construction, or if the shelf will sit above a sink or appliance, ask a qualified professional to inspect the area first.
Prepare and Finish the Shelf
Prepare the board before mounting it by smoothing rough edges, removing dust, and applying a finish to every exposed surface. Finishing the underside and end grain matters because those areas can absorb water from plant saucers.
Sand, Paint, or Stain the Shelving
Sand the board with medium-grit paper, then finish with fine-grit paper until the surface feels smooth. Wipe away dust with a slightly damp cloth and let the wood dry before coating it.
Paint gives the shelf a consistent color, while stain keeps the grain visible. Apply 2 thin coats rather than 1 heavy coat, allowing the drying time stated on the product label between coats.
For a smooth painted result, lightly sand between dry coats and remove all dust before recoating. Tocoton’s paint sheen guide for choosing the right finish can help you compare matte, satin, and semi-gloss options.
Do not mount the shelf until the finish has fully cured. A coating that feels dry can remain soft underneath, and plant pots may leave dents or stick to it.
Add a Waterproof Finish for Plant Displays
Use a water-resistant clear coat over stained or painted wood when the shelf will hold live plants. Polyurethane, spar urethane rated for the intended use, or a compatible water-based topcoat can reduce damage from drips, but no finish makes wood permanently waterproof.
Seal exposed end grain carefully and apply the number of coats listed by the manufacturer. Keep windows open for ventilation, avoid flames, and do not place plants on the shelf until the coating has cured according to its label.
Use a sealed saucer under every pot instead of placing a damp container directly on the wood. Water can still travel under a saucer, so lift each pot periodically and wipe both the shelf and the saucer dry.
Install the Floating Shelf Securely
Install the shelf by marking its position, fixing the bracket or cleat to the strongest available support, and checking the load before adding plants. A floating shelf can look light while exerting significant pulling force on the wall when its weight sits several inches from the fasteners.
Locate Wall Studs and Mark the Shelf Position
Choose a position with suitable light, enough head clearance, and no interference with doors, cabinets, or switches. For a display above a worktop, leave at least 12 inches of usable space above the surface unless the shelf instructions specify another clearance.
Use a stud finder to locate framing, then confirm the likely stud position with a small pilot hole in an inconspicuous spot. Mark the shelf’s top edge and bracket holes with a pencil, and use a level to draw a straight installation line.
A shelf fixed into 2 studs gives a stronger base than one fixed in a single stud. If the shelf cannot align with studs, use a bracket system designed for hollow walls and follow its load rating exactly.
Attach the Mounting Bracket or Cleat
Hold the bracket or cleat on the marked line and drill pilot holes slightly narrower than the screw shaft when fastening into wood. Drive structural screws into studs, ensuring the screw length passes through the bracket and sufficiently into the framing without contacting hidden services.
For a basic shelf, a continuous French cleat or long metal rail spreads the load better than 2 small point brackets. Use the hardware supplied with the shelf only when it is rated for your wall type and the expected finished weight.
Install the shelf onto the bracket, then tighten every locking screw. Do not rely on friction or the shelf’s weight to keep it attached.
Use the Right Wall Anchors and Check for Level
Use toggle bolts or another load-rated hollow-wall anchor for drywall when no stud is available. Plastic expansion plugs are generally suited to lighter loads, so check the package rating and subtract a safety margin for wet soil and accidental bumps.
For plaster, brick, or concrete, use the anchor and drill bit specified for that material. Stop if the drill meets unexpected resistance, and check again for wiring or plumbing before continuing.
The U.S. Consumer Product Safety Commission recommends securing furniture and household items that could injure someone if they fall, which is also a sensible approach for shelves mounted above seating or work areas. Test the installed shelf with a gradually increasing load, not a sudden full load, and remove it if the wall flexes, cracks, or pulls away.
Place a level across the shelf from front to back and side to side. A slight forward tilt can send water toward the wall or floor, so correct the bracket before arranging plants.
Arrange Plants on the Wall Shelf
Arrange plants by combining the shelf’s weight limit with each plant’s light and watering needs. A display looks balanced when heavier pots sit near the supports and trailing growth has room to hang without blocking the shelf below.
Choose Plants and Pots That Fit the Weight Limit
Choose compact plants in lightweight nursery pots placed inside decorative cachepots, but remember that the soil and water still count toward the load. Pothos, heartleaf philodendron, spider plants, peperomia, and small hoyas are practical choices for many indoor shelves.
Low-light plants still need usable light, not complete darkness. The University of Minnesota Extension advises matching houseplants to the light available at their location, so measure the space at different times of day before buying plants.
For a dim room, Tocoton’s guide to plants that thrive in low light can help you narrow the choices. Keep sun-loving plants near a bright window, but protect leaves from hot direct glass if they show bleaching or scorched patches.
Use the same pot style for a tidy display, or vary pot height while keeping the colors restrained. Avoid heavy ceramic containers on a narrow shelf unless the bracket and wall anchors are rated for their filled weight.
Protect the Shelf From Water and Create a Balanced Display
Keep the heaviest pot directly above a bracket or near the cleat rather than at the shelf’s unsupported center. Place trailing plants at the sides, and leave enough clearance for leaves to grow without brushing electrical outlets or blocking a window.
Water plants at a sink when possible, let excess water drain fully, and return the pots only after the saucers stop dripping. Tocoton’s guide to how often to water houseplants explains why watering frequency changes with light, pot size, season, and soil type.
Inspect the shelf, brackets, anchors, and wall every 4 weeks. Look for sagging, loose screws, swollen wood, dark moisture marks, or cracks around the anchors.
The U.S. Department of Agriculture recommends keeping indoor growing areas clean and monitoring plants for pests, so wipe dust from leaves and isolate any plant showing insects before it joins the display. Remove the arrangement immediately if the shelf shifts, the wall anchor loosens, or water damage appears.