WHAT YOU NEED TO KNOW
Staining is the most reliable way to protect your outdoor wood from harsh weather, and learning how to stain fence pickets yourself can save you thousands of dollars in professional labor costs.
- Using an airless or high-volume low-pressure sprayer allows you to coat a standard fence panel in under two minutes, which is ten times faster than manual brushing.
- According to wood preservation guidelines from the USDA Forest Products Laboratory, the wood moisture content must be below 12 percent before you apply any topical finish.
- A quality semi-transparent stain will typically protect vertical wood grain for three to five years before requiring a maintenance coat.
The ultimate longevity of your project depends entirely on the thoroughness of your cleaning step, as stain cannot adhere to dirt, biological growth, or wet wood fibers.
Paint vs. Stain: Which Is Better for a Wooden Garden Fence?
Homeowners often face a difficult choice when deciding how to paint wood fence panels versus how to stain them. While paint offers a solid block of color, it creates a surface film that is highly prone to cracking and peeling under direct sunlight. This fence stain vs paint comparison highlights the core practical differences you should consider for your yard in 2026.
| Performance Metric | Wood Stain | Exterior Wood Paint |
|---|---|---|
| Average Lifespan | 3 to 5 years | 5 to 7 years |
| Failure Mode | Fades gradually | Cracks, chips, and peels |
| Prep Work Required | Thorough washing only | Scraping, sanding, and priming |
| Typical Cost (per gallon) | $45 to $75 | $55 to $85 |
| Wood Grain Visibility | Preserves natural texture | Completely hides the wood |
Staining remains the preferred choice for most backyard boundaries because it penetrates the timber. When it eventually fails, it simply fades over time rather than peeling off in unsightly sheets. This means your future maintenance is as simple as a quick wash and a fresh coat, with no tedious scraping required.
What Are the Benefits of Staining Your Fence?
Protecting your backyard investment is more than just an aesthetic choice. Raw wood left exposed to the elements will deteriorate quickly due to rot, moisture cycles, and solar radiation.
- Water Repellency: Penetrating formulas seal the wood pores, which prevents rainwater from soaking in and causing the wood to warp, twist, or split.
- UV Protection: Premium stains contain pigments that act like sunscreen for your timber, blocking harmful ultraviolet rays that break down lignin and turn wood gray.
- Rot Prevention: Many modern formulas include mildicides that inhibit the growth of mold, mildew, and wood-destroying fungi.
- Cost Efficiency: Preventing structural rot means you avoid the high cost of replacing fence posts and pickets prematurely.
What Tools and Supplies Do You Need for Fence Staining?
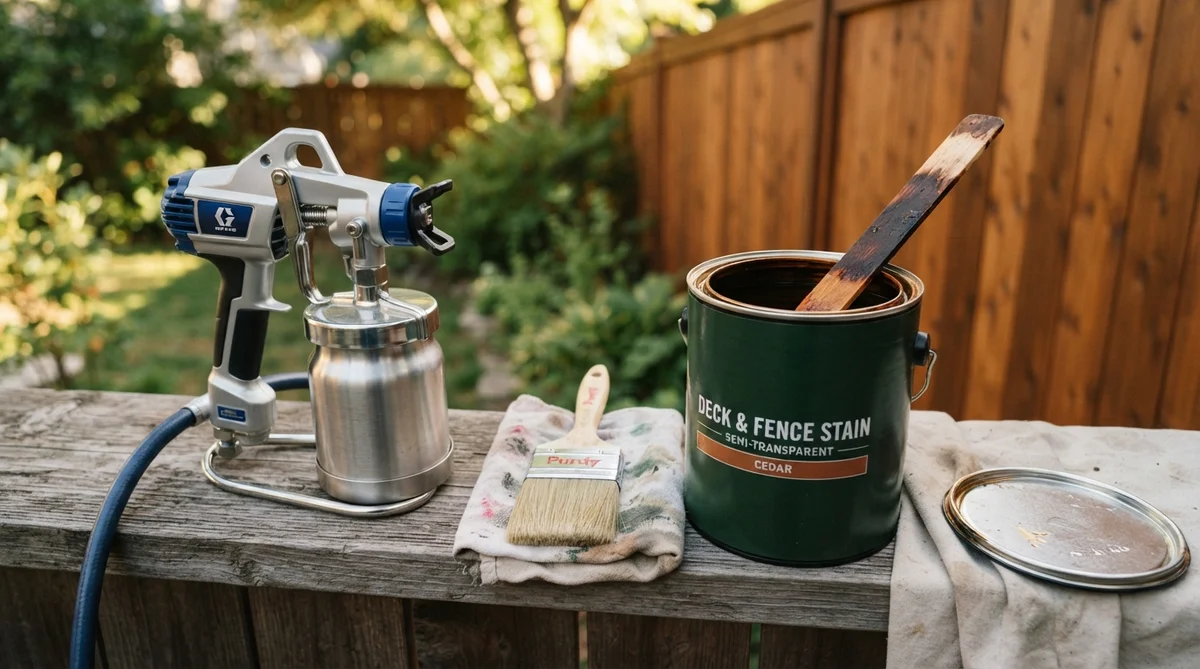
Gathering the correct equipment beforehand ensures a smooth, uninterrupted workflow. Having these items ready will help you achieve a professional finish without unnecessary trips to the hardware store.
- Paint Sprayer: A high-volume low-pressure (HVLP) or multi-finish sprayer speeds up the application process immensely.
- Synthetic Paint Brush: A high-quality 3-inch or 4-inch synthetic bristle brush is essential for back-brushing and cutting in edges.
- Wood Cleaner: A dedicated oxygen bleach or oxalic acid wood cleaner to remove biological growth and mill glaze without damaging wood fibers.
- Stiff Bristle Brush: A heavy-duty scrub brush with synthetic bristles to scrub away stubborn dirt during the washing phase.
- Personal Protective Equipment (PPE): Safety glasses, nitrile gloves, and a particulate respirator to protect your lungs from airborne mist.
How to Stain Fence Boards: Your Step-by-Step Guide
Applying stain is a straightforward weekend project if you follow a logical, structured process. Taking your time during each phase ensures the protective coating bonds deeply with the wood fibers.
Step 1: Prep and Clean the Wood
You must start with a clean surface, even if your fence is relatively new. Apply your wood cleaner diluted according to the manufacturer’s instructions, then scrub the wood thoroughly with your stiff bristle brush.
Avoid using high-pressure washing systems at close range, as they can easily gouge the wood and raise fuzzy fibers. Instead, rinse the cleaner off completely with a standard garden hose equipped with a high-flow nozzle.
If you are staining pressure treated fence panels, the timing is critical. Oregon State University Extension services recommend letting new pressure-treated wood cure for three to six months until the internal moisture level drops below 12 percent before applying any topical treatment.
Step 2: Protect the Surrounding Area
Wind can carry fine spray mist surprisingly far, so you must safeguard your surroundings before you begin spraying. Cover nearby plants, shrubs, and grass with lightweight plastic sheeting or canvas drop cloths.
Use painter’s tape to mask off any metal hardware, latch systems, and adjacent concrete posts or brick pillars. If your fence borders a neighbor’s property, notify them beforehand and protect their side from potential overspray.
Step 3: Apply the Stain (Brush, Roller, or Sprayer)
Fill your sprayer reservoir with well-stirred stain and adjust the nozzle spray pattern to match your boards. Work panel by panel, spraying vertically along the direction of the wood grain while overlapping each pass by about 50 percent.
Keep the spray gun at a consistent distance of 10 to 12 inches from the surface to prevent uneven pooling. If you do not have a sprayer, you can use a thick-nap roller designed for rough surfaces, but you must work the material into the gaps between boards manually.
Step 4: Back-Brush and Apply a Second Coat
Immediately after spraying or rolling a section, use your synthetic brush to work the wet stain deep into the wood grain. This process, known as back-brushing, levels out runs, fills in deep pores, and ensures even coverage.
- Work quickly while the product is still wet, as modern water-based stains can dry within 15 to 20 minutes on a warm day.
- Let the first coat dry for the exact duration recommended on the product label, which is typically two to four hours under normal conditions.
- Apply the second coat using the same spraying and back-brushing technique to build up maximum weather protection.
What Are the Crucial Tips for a Successful Staining Project?
Achieving professional results requires paying attention to local weather patterns and wood conditions. Minor adjustments to your technique can prevent common application errors and prolong the life of your finish.
- Check the Weather Forecast: Ensure there is no rain projected for at least 24 to 48 hours after application, and avoid working in direct, scorching sunlight.
- Test a Hidden Area: Always apply a small amount of stain to an inconspicuous spot first to verify that the color and absorption meet your expectations.
- Maintain a Wet Edge: Always work from top to bottom on individual boards, completing entire panels without stopping to prevent dark lap marks.
- Stir Your Stain Frequently: Pigments settle quickly at the bottom of the bucket, so stir the product thoroughly every 15 to 20 minutes during application.
Fence Staining FAQs
Should I pressure wash my fence before staining?
You can use a pressure washer, but you must exercise extreme caution to prevent damaging the delicate wood fibers. Industrial units operating at high pressure can easily carve deep grooves into softwoods like pine or cedar. If you choose to use one, select a wide fan tip, keep the pressure below 1,500 PSI, and maintain a distance of at least 12 inches from the wood surface.
How many coats of stain does a fence need?
Most high-quality semi-transparent and solid stains require two coats to provide uniform color and adequate protection. The first coat penetrates the dry wood fibers, while the second coat seals the surface and evens out any light spots. Clear sealers and some specialized oil-based wood toners may only require a single, heavy application, so always verify with your product’s specific instructions.
How often do I need to restain my fence?
In general, you should plan to restain your wooden fence every three to five years. High-exposure areas that receive intense midday sun or heavy winter moisture will naturally degrade faster and may require attention sooner. A simple way to check is the water splash test: splash a few drops of water onto the wood, and if it sinks in immediately rather than beading up, your fence is ready for a fresh coat.
Can you stain an old, weathered fence?
Yes, you can successfully stain a weathered fence, but it requires significant chemical preparation beforehand. Old gray wood fibers are chemically degraded by UV exposure and cannot hold a finish, so you must use a wood restorer or wood brightener to strip away this dead surface layer. Once you scrub away the gray cells and expose the fresh, golden wood underneath, the stain will adhere beautifully and look brand new.