WHAT YOU NEED TO KNOW
Packing road trip food safely requires keeping perishable items at 40 degrees Fahrenheit or lower while maintaining an organized, leakproof layout. Learning how to pack food for a road trip properly ensures your snacks stay dry, fresh, and completely safe from bacterial growth during long highway drives.
- Maintain a strict 2:1 ice-to-food ratio inside hard-sided coolers for trips lasting longer than 24 hours.
- Pre-chill your cooler with a dedicated ice bag for at least 12 hours before loading pre-refrigerated meals.
- Keep raw meats sealed in watertight containers at the very bottom of the cooler directly on block ice.
Your cooler ice retention varies significantly based on direct sunlight exposure, vehicle cabin temperature, and how frequently passengers open the lid.
What Equipment Do You Need to Pack Road Trip Food?
Having the right gear prevents soggy bread, crushed fruit, and dangerous temperature spikes during long car journeys. Investing in durable, leakproof storage allows you to enjoy fresh meals at rest stops without spending extra money on roadside fast food.
Choosing the Right Cooler and Containers
Selecting the correct cooler setup depends on your travel duration and vehicle space. A dual-cooler strategy keeps high-traffic drinks separate from perishable meals, preserving internal cold air for items that spoil easily.
- Rotomolded Hard Coolers: These thick-walled units retain ice for 3 to 7 days, making them essential for multi-day highway travel.
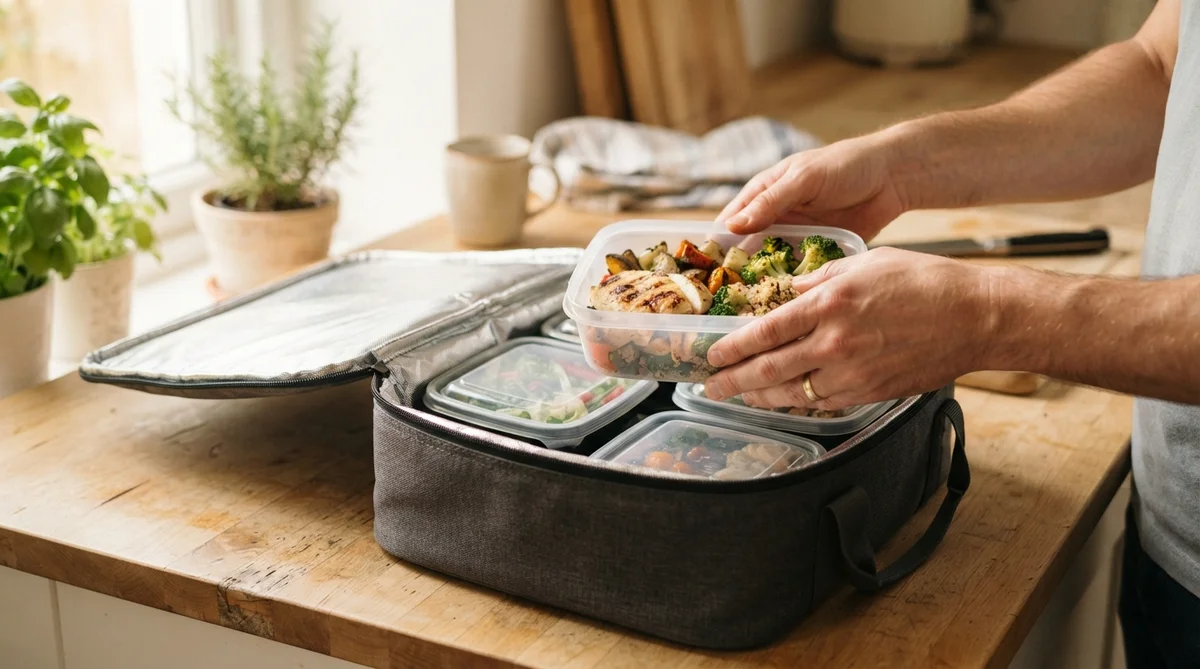
- Soft-Sided Backpack Coolers: Perfect for single-day trips or keeping lunch items easily accessible in the passenger footwell.
- Airtight Plastic and Glass Containers: Heavy-duty containers with silicone gaskets block melting ice water from soaking your sandwiches and cheese.
Dry Snack Bins and Storage Solutions
Non-perishable snacks require rigid protection so they do not end up crushed under heavy duffel bags. Clear plastic storage bins with latching lids allow passengers to view available treats instantly without digging through bags. Fabric trunk organizers with adjustable dividers keep chip bags, nut boxes, and fruit pouches upright during quick turns and sudden stops.
How to Pack Food for a Road Trip Cooler to Keep Perishables Safe
Proper arrangement inside your cooler forms a thermal barrier that preserves cold temperatures for days. Following a structured packing order prevents cross-contamination and minimizes food spoilage on the road.
Pre-Chilling Your Cooler and Food
Loading warm containers into a room-temperature cooler wastes up to half of your ice mass within the first two hours. You should always chill your food down to 35°F to 38°F in your home refrigerator overnight before packing. According to guidance on how long food can sit out safely, room-temperature food speeds up ice melt and encourages bacterial growth.
- Dump 5 to 10 pounds of sacrificial ice into your cooler 12 hours before your trip to drop the inner lining temperature.
- Drain the melted pre-chill water right before adding fresh ice and cold food items.
- Chill all beverages in the home refrigerator so they do not draw thermal energy from your cooler ice.
Mixing Ice Types for Extended Cooling
Combining different ice formats creates a denser cooling matrix that resists warm air intrusion. Block ice melts much slower than cubed ice, while small cubes fill air gaps between irregular container shapes.
- Block Ice: Place solid blocks at the bottom to form a frozen thermal baseline that lasts for days.
- Cubed Ice: Pour loose ice cubes over packed containers to eliminate trapped air pockets.
- Reusable Gel Packs: Use flat ice sheets on top of delicate produce to prevent frostbite caused by direct contact with raw ice.
Proper Layering: Building Cold Floors and Ceilings
A smart cooler packing layout food safety strategy relies on thermal density, since cold air naturally sinks toward the floor of your cooler. Place your heaviest, most perishable items at the base and lighter, ready-to-eat items near the top.
- Bottom Layer: Position raw meats, poultry, and block ice at the very base where temperatures remain lowest.
- Middle Layer: Stash dairy items, deli meats, cooked leftovers, and sealed condiments in watertight plastic bins.
- Top Layer: Rest delicate fruits, leafy greens, wrapped sandwiches, and gel ice packs across the top shelf or basket tray.
How Do You Prevent Messes and Soggy Food?
Water infiltration is the most common reason road trip food gets ruined inside a cooler. Keeping liquids contained and moisture out guarantees your meals remain appetizing throughout the travel day.
Anti-Soggy Sandwich and Wrap Strategies
Bread acts like a sponge when exposed to humidity or melting ice inside an unsealed cooler. Assembling ingredients during travel stops preserves crunch and texture far better than pre-making sandwiches at home.
- Pack bread slices separately in rigid plastic containers rather than thin plastic bags.
- Spread condiments like mayo or mustard between meat slices instead of directly on the bread to form a moisture barrier.
- Wrap individual wraps or sandwiches tightly in butcher paper followed by aluminum foil before sliding them into press-seal freezer bags.
Portioning Foods in Individual Containers and Mason Jars
Single-serve packaging eliminates the need to unpack large containers while sitting in a parked car. Wide-mouth glass or BPA-free plastic jars work exceptionally well for layering salad greens above heavy dressings. Pre-portioning trail mix, sliced veggies, and hummus into individual snack containers keeps mess to a minimum and prevents hands from contaminating large family packages.
What Are the Best Road Trip Meal and Snack Ideas?
Selecting low-maintenance foods keeps driver distraction low and cleanup quick. Focus on items that require minimal utensil use and produce very little crumb fallout inside the cabin.
Easy Car Breakfast Ideas
Start your drive with mess-free morning meals that do not require heating or complex assembly in the driver seat.
- Overnight Oats: Mix oats, milk, chia seeds, and berries in sealable jars for a nutrient-dense morning meal.
- Hard-Boiled Eggs: Peel them ahead of time and store them in hard-shell containers for instant protein.
- Whole Grain Breakfast Burritos: Wrap scrambled eggs, cheese, and black beans in foil to eat chilled or warm.
Cooler-Friendly Lunches and Dinners
Hearty lunches and dinners keep the entire vehicle energized without requiring stop-offs at fast food drive-thrus.
- Cold Grain Bowls: Quinoa or brown rice mixed with roasted vegetables and chicken holds up well without getting soggy.
- Pasta Salads: Olive oil or pesto-based pasta dishes resist spoiling better than heavy mayonnaise mixtures.
- Traveling with Frozen Foods: Freeze pre-cooked chili or taco meat solid in flat freezer bags; they act as extra ice blocks before thawing safely for evening heating.
Non-Melting, Low-Mess Snacks
Keep these items inside your dry snack bin within easy reach of passenger seats for quick cravings between stops.
- Dried fruit slices, apple chips, and pitted dates.
- Roasted chickpeas, unsalted almonds, and pumpkin seeds.
- Whole apples, oranges, and seedless grapes chilled in a small tote.
What Are the Vital Food Safety Guidelines for Road Trips?
Maintaining food safety rules on the highway prevents foodborne illnesses from disrupting your vacation plans. Storing perishable foods at accurate internal temperatures is your best defense against harmful bacteria.
How Long Perishable Food Lasts in a Cooler
According to safety recommendations from the USDA Food Safety and Inspection Service, perishable foods remain safe only as long as internal cooler temperatures stay at 40°F or below. When considering how long will meat last in a cooler ice setup, properly packed raw meat wrapped in double-sealed bags can last for 2 to 4 days if completely surrounded by fresh ice. Check temperature levels frequently using a stem thermometer; calibrating a food thermometer before your journey ensures your readings remain precise.
Avoiding the Food Safety “Danger Zone”
Bacterial growth accelerates rapidly when food sits inside the temperature range between 40°F and 140°F. Leaving perishable items in this range leads to unsafe conditions within just two hours.
- Discard any perishable food exposed to temperatures above 90°F for more than 1 hour in a warm car cabin.
- Keep your main cooler in the air-conditioned passenger area rather than a scorching trunk during summer travel.
- Store a practical car emergency kit nearby that includes antibacterial wipes and hand sanitizer for clean prep surfaces.